14 Creative and Simple Photographic Projects for Children at Home
Creative analogue photographic projects to keep the kids busy and happy
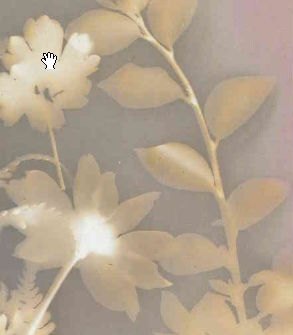
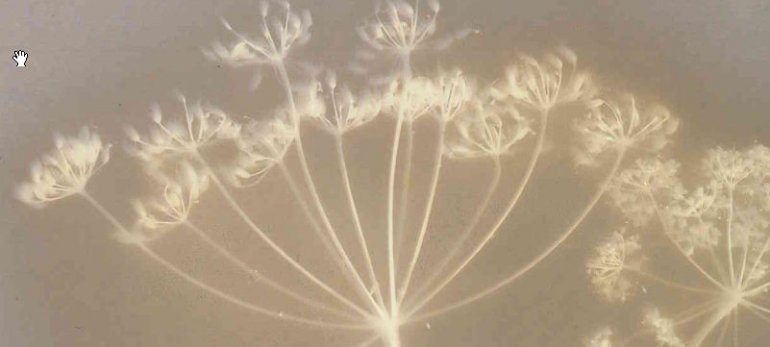
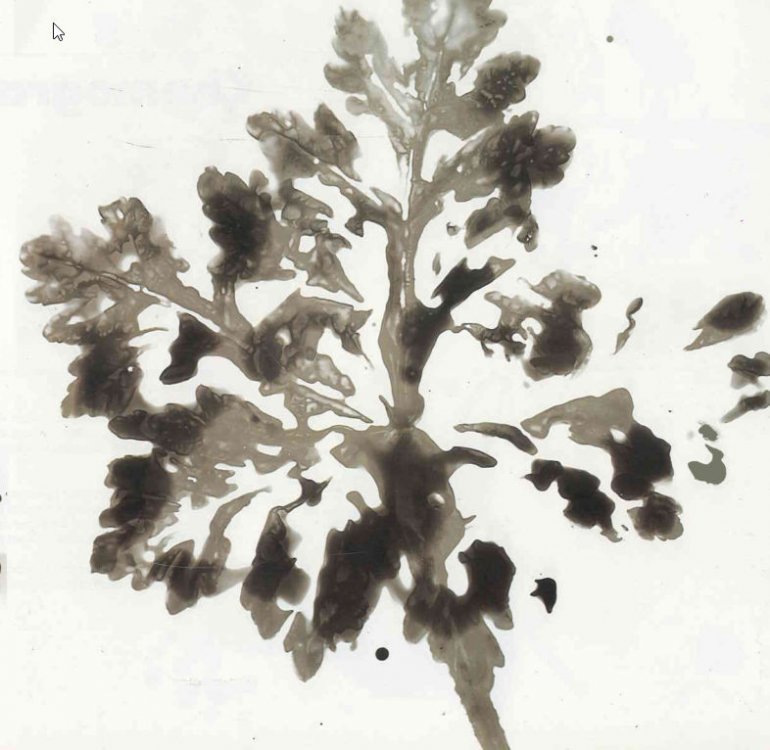
Day 1 - Sun Pictures - Sunlight on Photographic Paper
Items needed
Photographic paper
Black changing bag
Grasses, flowers, leaves, cut-outs, shapes etc
Piece of board
Piece of glass or hard, clear plastic
Dish of fixer
Dish of water
One set of tongs
Toilet rolls or paper towels
The project
Sunlight on paper
Objective
Exploring the effect of light on photographic paper. Discovering how to keep the image made by the light without it fading away.
Method
1 Design the picture using the grasses etc. on a piece of ordinary paper.
2 Using the changing bag, take a sheet of photographic paper from the box.
3 Place the photographic paper on the board.
4 Quickly transfer the design of the grasses etc. to the photographic paper.
5 Cover the design with the sheet of glass to keep it in position.
6 Place it outside in the sunshine.
7 Leave it until the paper has turned a deep colour. This can take from 15 seconds to 30 minutes, depending on the strength of the sun.
8 Quickly take off the grasses etc. and slip the paper into the dish of fixer. Make sure it is completely covered with fixer.
9 Leave it to fix for the recommended time (see the instructions supplied with the fixer).
10 Transfer the paper to the dish of water.
11 Thoroughly wash each print in running water after the session.
Extra Ideas
The list of items that can be placed on the paper to make sun pictures is endless. Some of the more unusual items you may like to try are:
1 Postcards, photographs, newspaper cuttings or paper printed on one side only. Place them face down on the photographic paper and use the glass to ensure they are flat on the paper.
2 Ordinary paper with designs drawn on, but with the paper smeared with grease or oil to make it more transparent. Place it on the paper in the usual way. Make sure any grease transferred to the photographic paper is well washed off (with soapy water) before fixing.
3 Make designs on clear acetate and place them in contact with the paper.
Notes
1 As the photographic paper is blue-sensitive, areas of the paper covered with blue flowers do not show up very well from the background. The best colour of flowers to use is red or yellow. But sometimes the colour of a flower is not what it seems. For example, purple flowers transmit very little blue light but a large amount of red light. For this reason, purple flowers show up well on the paper.
2 The sap from freshly cut leaves and flowers affects the paper. This is seen as a dark halo around the image of the plant on the paper.
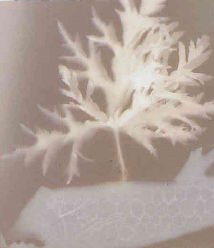
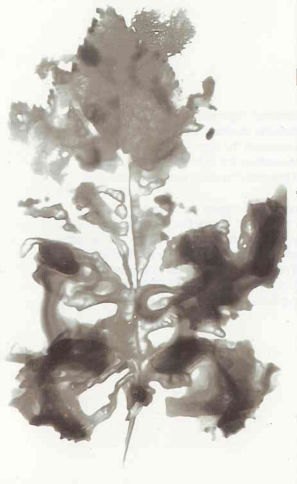
Day 2 - Chemograms – Chemical Drawings on Photographic Paper
Items needed
Photographic paper
Black changing bag
Paintbrushes, cotton wool buds, dried out felt tip pens etc
Small containers for the developer
Dish of developer
Dish of fixer
Dish of water
One set of tongs
Toilet rolls or paper towels
The project
Using photographic chemicals - developer or fixer to "draw" on photographic paper. Often known as Chemograms, they help to explore the effects, in conjunction with light, on photographic paper.
Developer considerably speeds up and amplifies the darkening process caused by the light on photographic paper. Children must grasp that the developer is not ink. It is a colourless liquid that reads with the special paper which has been exposed to light.
Fixer neutralises the photographic paper, so it is no longer sensitive to light or developer. Usually, fixer is used at the end of the experiment to make the results on the paper permanent. If parts of the paper are painted with fixer before being developed, those parts of the paper will not darken.
The idea of painting developer and fixer onto photographic paper is building on the already known concepts of painting with paints on ordinary paper.
Developer on paper
Objective
To show the effect of the developer on photographic paper.
Method
1 Draw the picture you want on a piece of ordinary paper. Do not make it too
intricate or it will be difficult to copy using a developer.
2 Using the changing bag, take a sheet of photographic paper from the box.
3 With a paintbrush etc dipped in the developer, draw the design on the paper. Use
plenty of developer, but not enough to run down the paper.
4 When your design has fully darkened, rinse the paper in the dish of water.
5 Transfer the paper to the dish of fixer and leave it for the recommended time to
make the image permanent.
6 Wash each piece of paper thoroughly in running water at the end of the session.
Extra ideas
1 Let drops or splashes of developer run across the paper to give patterns.
2 Soak shapes of absorbent material in developer and press them against the paper.
When positioning or removing shapes, take care not to drip the solution onto the surrounding area of the paper. It is useful to blot any drips on tissues before pressing the shapes onto the paper.
3 Try using overdiluted or partly exhausted developer so the paper turns dark more slowly or only to a dark grey instead of black. If only small amounts of developer are painted onto the paper it may become exhausted before a black colour is reached.
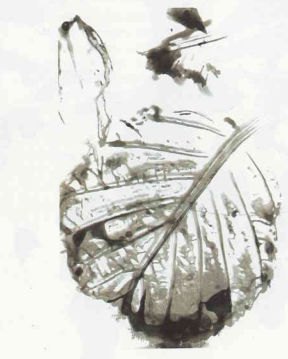
Day 3 - Photograms
Photograms explore what happens when light cannot reach photographic paper, but the paper is then processed in the usual way - develop, rinse, fix and wash. Photograms are similar to the sun pictures described in Day 1. Instead of a long exposure, as is necessary with sun pictures, the paper is exposed briefly and
developer is used to amplify the image.
Photograms are sometimes called shadow pictures. This is because the images on the pictures are made up of the shadows of objects placed on the paper.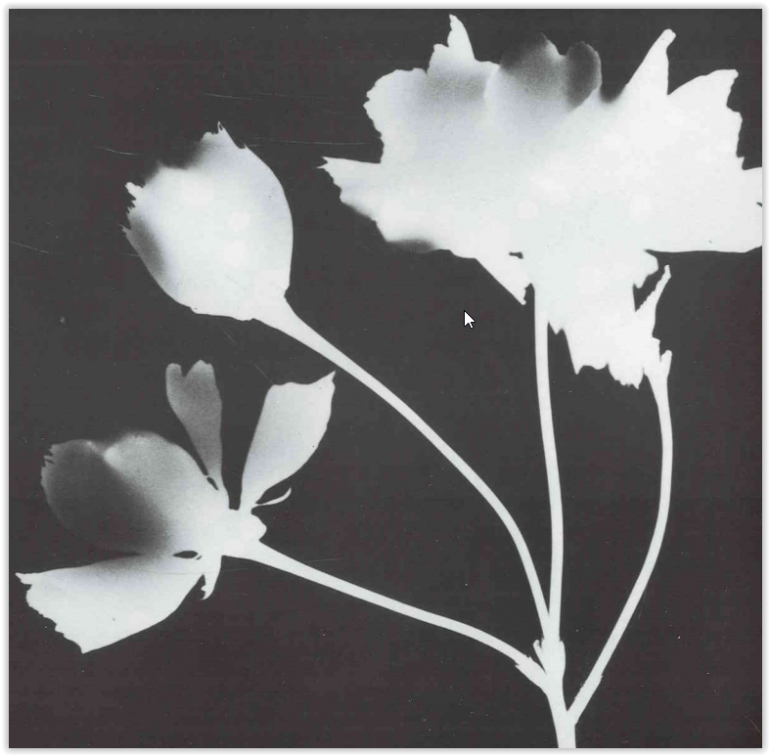
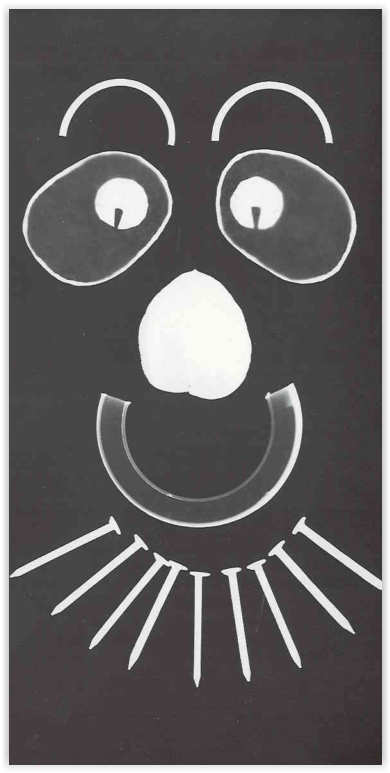
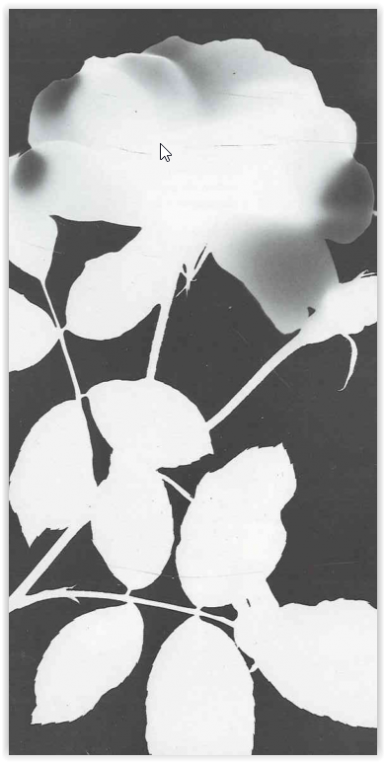

For foolproof results, choose totally opaque objects, such as coins. No light can reach the paper under the coins so no matter how much exposure or development you give to the paper the area under the coins will stay white.
With translucent objects, it is necessary to experiment to find the amount of exposure. Translucent objects will reduce the amount of light reaching the paper, and total development should give a shade of grey with the surrounding paper black. If too much exposure is given, the area under the translucent object will go black.
A guideline to the amount of exposure needed for photograms is to use a 40-watt desk lamp about 40cm vertically above the paper for two seconds. Longer times can be used with a lower wattage light bulb held further away from the paper. A bright torch is an alternative light source. If the light is uneven, try using slightly different angles with the torch to 'paint' the light onto the paper.
An accurate clock is unnecessary for timing the exposure. Use a phrase that takes about a second to say. For example, a two-second exposure can be 'timed' by saying "one donkey two donkey."
The type of light used to make the exposure influences the sharpness of the final picture. Sharpest results are obtained by using a small light source a relatively long way from the paper. A small light source can be made by taping a piece of black card (or several sheets of old carbon paper) with a small hole (about 5mm in diameter) over a desk lamp or torch.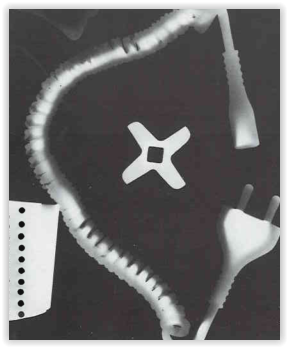
Day 4 - How to make a Photogram
Objective
To discover the effect on photographic paper when no light, or a reduced amount of light, reaches photographic paper.Method
1 Design the picture using the objects on a piece of ordinary paper.
2 In safe lighting (your room needs to blacked-out from extraneous sources of light), place a sheet of photographic paper on the bench.
3 Arrange the objects on the paper to the design.
4 Expose the paper with the light vertically above it.
5 Process the paper in the usual way.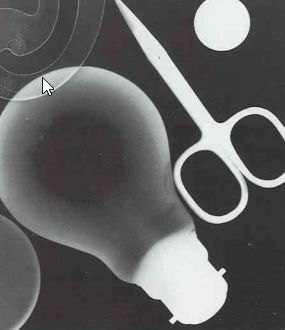
Items needed and Method
Photographic paper
Assortment of opaque objects Desklarnp (about 40W) or torch Dish of developer
Dish of water
Dish of fixer
Two sets of tongs
Toilet rolls or paper towelsWork in this order:
Shine light, develop the print, rinse it in water for a minute, then fix it in the fixer dish then wash for two minutes.
Extra ideas
1 Try using translucent and transparent objects. A little trial and error may be needed before the exposure is right. The shape of some translucent objects alters the path of light through them so you can get unexpected dark and light areas, see the example of the light bulb.
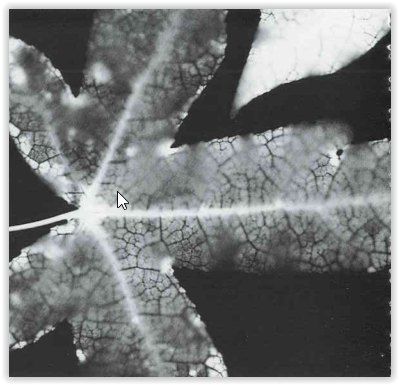
2 Feathers and leaves give interesting effects, especially if the exposure is increased such that the veins and structures can be seen on the paper. A sheet of glass is useful to ensure the objects are flat against the paper.
3 There is no need to restrict the experiments to flat objects, try three-dimensional
ones with different faces against the paper.
4 Try exposing the paper by shining the light at different angles to the paper. You
should then get light and dark grey shadows cast on the paper, as well as the more solid shadow where the object touches the paper.
5 Have a project comparing the leaf shapes available.
6 Place a centimetre grid over the photographic paper before arranging the shapes to make the photogram. Estimate the projected area of each shape.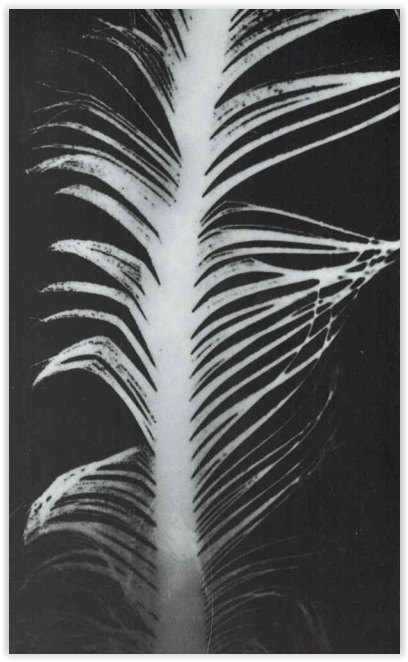
Day 5 - Photo Batik - the youngster's favourite
Photo-batik pictures are made when either the developer or the fixer cannot reach some areas of the paper. These areas are masked using skin cream. Photo-batik is an extension of using wax and paint to make batik pictures.
Young children sometimes prefer photo-batik to chemograms, even though it appears more difficult.
Glossy paper is the best surface to use for photo-batik as the skin cream can be easily washed off. Stipple or silk surfaces tend to make it difficult to remove all the cream.Objective & Method
To show what happens when a developer cannot reach some areas of the paper.
1 Design the picture on a piece of ordinary paper, using black and white only.
2 Using the changing bag, take a sheet of photographic paper from the box.
3 Put skin cream on the areas that are to stay white. Use fingers for large areas and paintbrushes etc for the finer detail. The head of the paintbrush gives feathery designs.
4 Scratch out the parts of the design that need to stay black. The background, not covered with cream, will also go black.
5 If a white speckled background is wanted, lightly spray the paper with fixer.
6 Develop the paper in the usual way.
7 Wash all the cream from the paper in the detergent wash.
8 Rinse the paper with clean water.
9 Fix and wash the paper in the usual way.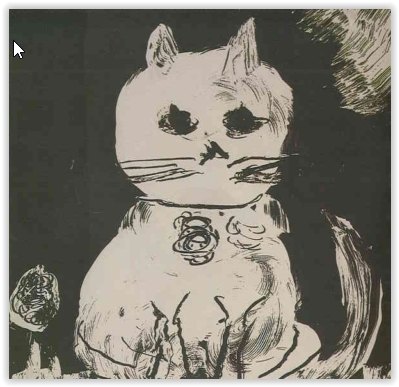
Items needed and procedure
Photographic paper Black changing bag Skin cream
Paintbrushes, toothpicks, cotton wool buds, cocktail sticks
Fixer solution
Spray bottle for fixer Dish of developer
Dish of detergent water (a bucket or a bowl)
Dish of water Dish of fixer
Two sets of tongs
Toilet rolls or paper towelsLight, develop, soap wash, rinse, fix and then final wash.
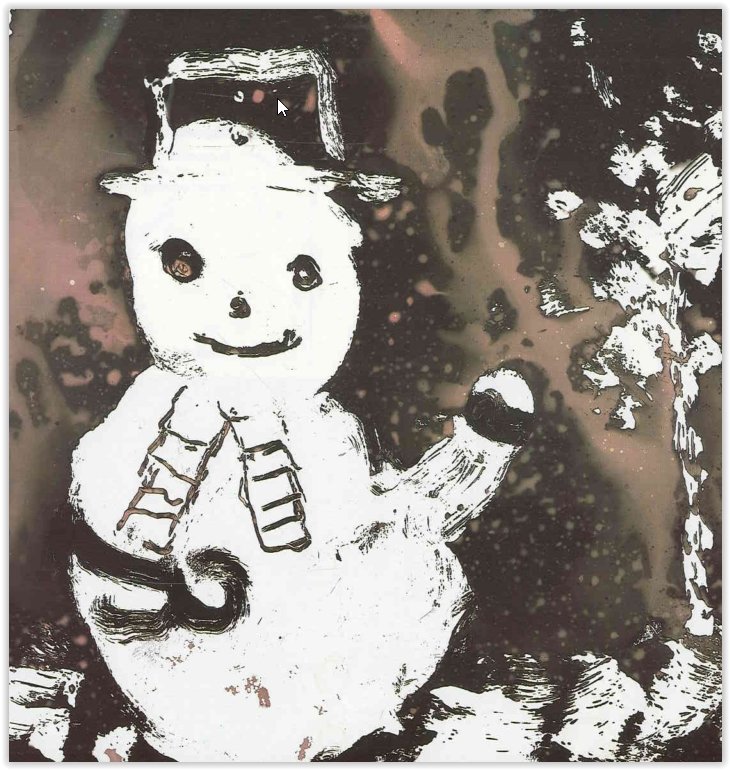
Day 6 - Photo Batik 2 - Paper protected from Fixer
Objective
In this project, you'll see how fixer makes photographic paper inactive to light and developer.
Method
1 Design the picture on a piece of ordinary paper, using black and white only.
2 Using the changing bag, take a sheet of photographic paper from the box.
3 Put skin cream on the areas that are to go black. Use fingers for large areas and paintbrushes etc for the finer detail. The head of the paintbrush gives feathery designs.
4 Scratch out the parts of the design that need to stay white. The background, not covered with cream, will also stay white.
5 If a black speckled background is wanted, lightly spray the paper with the developer.
6 Put the paper into the dish of fixer.
7 Wash all the cream from the paper in the detergent wash.
8 Rinse the paper with clean water.
9 Develop, rinse, fix and wash the paper in the usual way.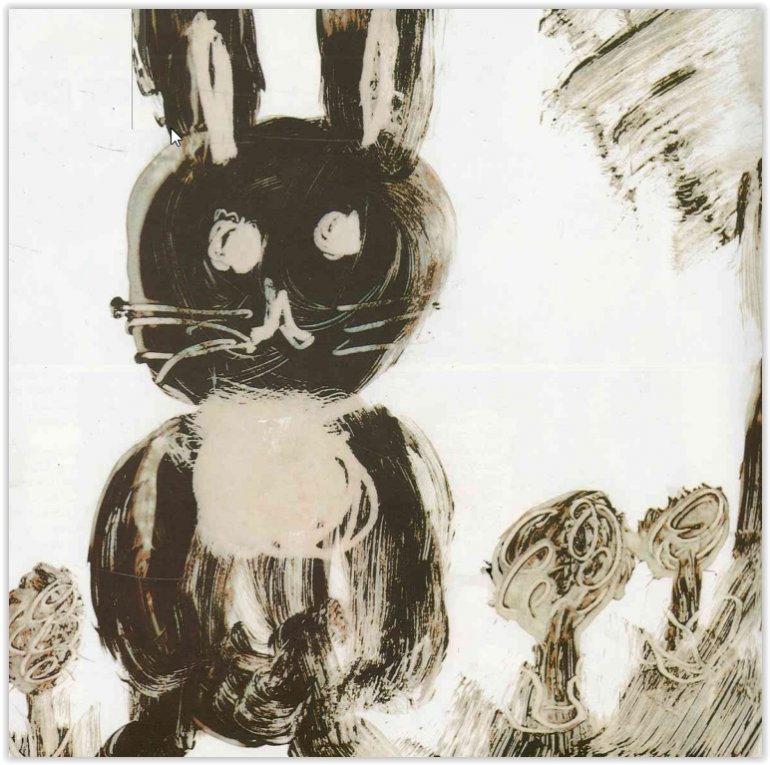
Items needed and Method
Photographic paper Black changing bag Skin cream
Paintbrushes, toothpicks, cotton wool buds, cocktail sticks
Developer solution
Spray bottle for developer Dish of developer
Dish of detergent water (a bucket or a bowl)
Dish of water Dish of fixer
Two sets of tongs
Toilet rolls or paper towelsLight, fix, soap wash, rinse, develop, rinse and fix and then finally wash.
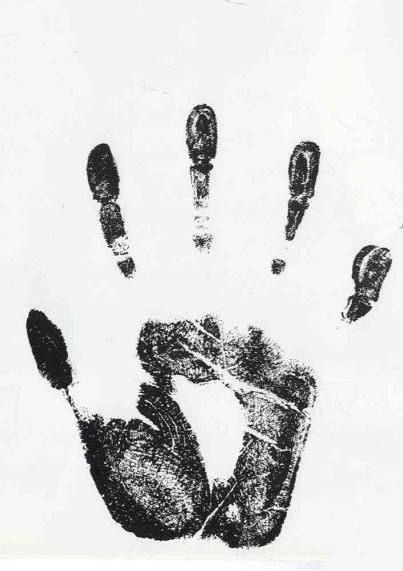
Extra ideas
As with the earlier experiment, grease your hand and press it onto the paper. You get a black palm print on a white background.
Day 7 - Making a Pinhole Camera
Method
1 Cut a 2cm square hole at the front of the box.
2 Cut a 4cm square of metal. Prick the centre of the piece of metal with the compass or needle.
3 Smooth both sides of the metal with emery paper.
4 Tape the metal inside the box over the hole.
5 Paint the inside of the box and the lid with black paint. Unblock the pinhole if necessary.
6 Use paper clips or Blu-Tack to hold a sheet of the photographic paper opposite the pinhole.
7 Tape a 'shutter' across the pinhole with black tape.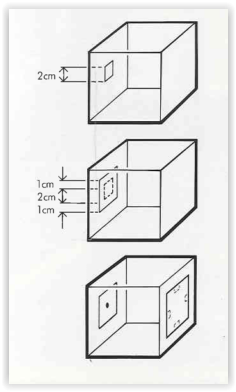
Items needed
Box with deep fitting lid (cylindrical, square or rectangular)
Black tape
Matt finish black paint Paintbrush
White spirit
Flat thin sheet of metal (that can be cut with strong scissors)
Compass point or needle Emery paper
Paper clips or Blu-Tack Strong scissorsPlease Note
1 Tin foil can be used for the pinhole area, but thin metal gives better results.
2 The size of the pinhole substantially affects the quality of the pictures taken. If it is too large, more light will reach the paper and thus shorter exposure times will be
needed, but the image will be less sharp. It is better to err on the side of too small than too large, but it is possible to lose some sharpness with a very small pinhole through diffraction.
Day 8 - Taking Pictures with your Pinhole Camera
You will need a large black changing bag - big enough to take the camera and the box of paper. Alternatively, you can load the camera in safe lighting.
Place the paper flat against the inside wall of the camera, with the emulsion side facing the pinhole. Use paper clips or Blu-Tack to secure it. Make a small notch on the top of the paper, so it is possible, after processing, to see that the image was formed upside down in the camera. Refit the camera lid.
The camera is now ready to take a photograph.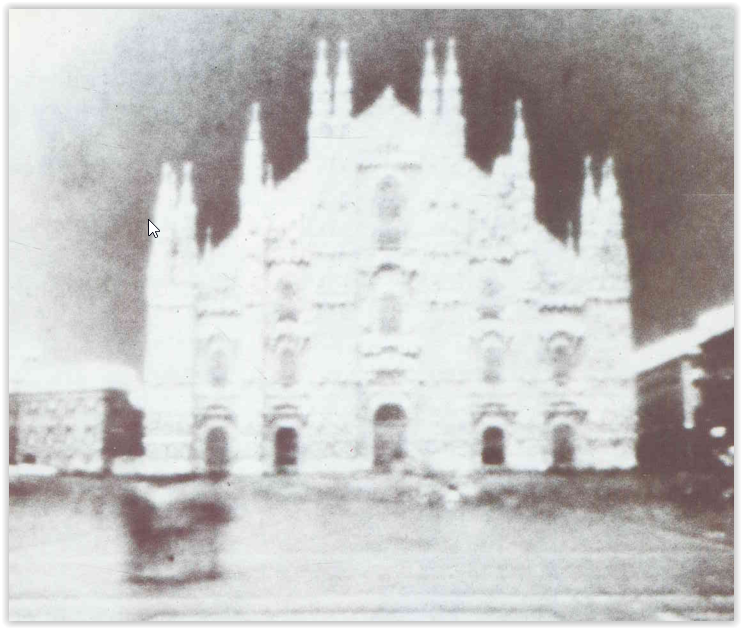
How to take a Pinhole Picture
Choose a reasonably bright day. Decide on the picture and place the camera on a firm surface facing the scene. Weight it down with a few books or a brick. This keeps the camera still during the exposure so the picture should be sharp.
Decide on the exposure and lift the tape shutter to let light into the camera for the appropriate time. The length of time has to be experimental. It will depend on the size of the pinhole, the distance between the pinhole and the paper, how bright is the day and the sensitivity of the photographic paper. The following table gives a guide which you could start with.
Day Minutes
Very bright 2
Bright 3
Dull 4
Very dull 6
At the end of the exposure time, cover the pinhole firmly with the tape shutter.Negative Picture taken with a Pinhole Camera

Part of a series - keep coming back every day for the next two weeks.
This free service goes out to stressed parents at home looking for creative (and time-consuming) projects at home during the COVID-19 emergency. If you need any of the products to complete the project, we can happily supply you but this is our little helping hand to you all because we're all in this together.
Keep safe and well.
Rodney Bates - Director 24h April, 2020
Happy Easter and keep safe and well.
-
Posted by Rodney Bates
1st April 2020


Recently viewed...


