Toning - a great Coronavirus Lockdown Pastime
Toning a black & white print is a relatively easy way of adding an extra touch to your mono images and a great lockdown pastime.
Why and when to tone
The process of toning offers the photographer a chance to add a colour cast to a black & white print. It might seem strange to want to add a cast to something purposely shot on monochrome film, but the technique can give a print extra zip when used in the right context. Blue and sepia are the most common colours used for toning, but there are a range of other colours available, including selenium, gold and copper-red.
The first thing you'll want to consider before you shell out for one of these kits is whether or not the process of toning will really add anything to your print. Toning isn't going to transform an uninteresting or badly exposed shot into something worthy of putting up on your wall. Neither is it going to do much for an image that already lends itself to the stark qualities of monochrome. What it can do is enhance the atmosphere, mood or theme of a well-exposed and composed shot that might just need a little extra something - there are certainly many very good prints made excellent with the addition of another colour.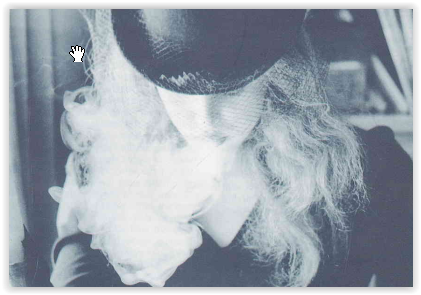
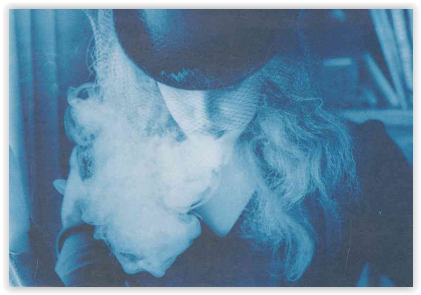
Blue as a colour is generally associated with cold, be it the physical feeling or the actual emotion. Hence blue toner is very good for emphasising a wet and wintry day, the sombre mood of a character portrait, or perhaps even the sterility of a hospital Ard It can also be used to add a sense of mystery or an eerie feeling; perhaps to an empty street at night, or to a derelict house. The effect very much depends on how much the print is toned, a soft tinge of blue will evoke a very different sense to a rich deep shade.
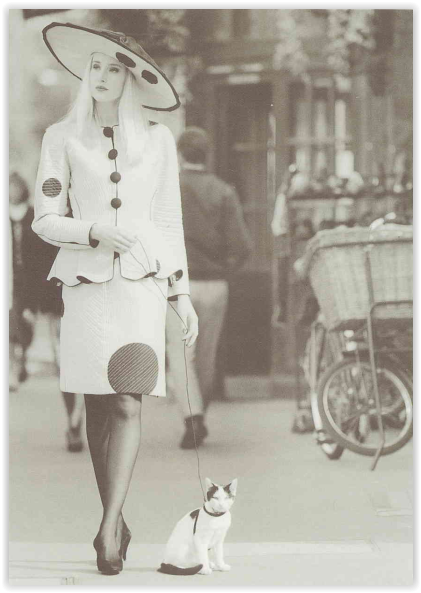
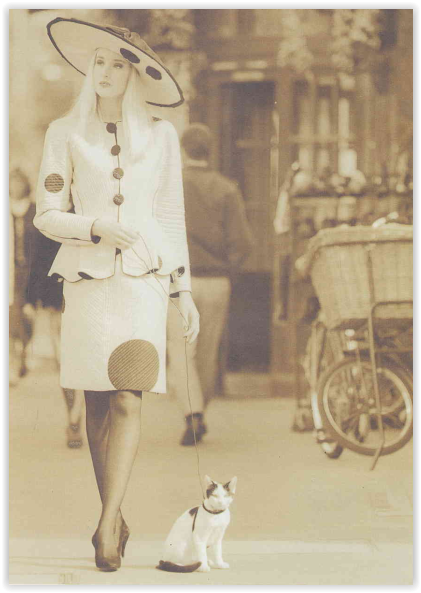
Sepia is a much warmer colour and has the almost opposite effect. It's good for emphasising the tranquillity of a country scene or the warmth in a portrait of a mother and child. It also works very well with stonework, be it statues or buildings, and can lend a more pleasing dimension to any subjects that might look rather austere in black & white. It's similar in appearance to the colour of very old photographs, making it ideal for creating that time-worn, nostalgic feel.
Selenium toner is mainly used to make prints archivally permanent so they don't fade over time, and to give a nice boost in contrast - it shows little colour change with normal paper.
With warm-tone printing papers, however, selenium does give sepia-like colour changes that can be very attractive. Other colours such copper-red probably have more limited applications but are worth experimenting with nonetheless. If you want to give it a go, there's also a whole range of specialist toning kits for colours such as Rockland's Polytoner. Your only limit is your imagination!
How it's done
While some colours are slightly harder to get the hang of than others, the process is pretty straightforward as long as you've got a little time and patience - you don't need a darkroom, and the chemicals are widely available from most photographic dealers.
What you do need are some print trays, and a set of tongs to ensure you don't contaminate the prints with your fingers, or contaminate your clothes and skin with the chemicals. A nearby sink is also vital.
It's initially best to dilute the toners according to the manufacturer's instructions; you can start playing around with dilutions and toning times for different effects once you've got the hang of it.
The most popular sepia toners require you to bleach your print first. With blue, gold and selenium toners, all you do is immerse your print in the chemical until you've got the desired colour, although gold toner requires a print to be sepia-toned first. With any toner, it's vital to make sure that the chemicals are continually agitated by lifting the trays, and rocking them back and forth.
Washing prints, particularly with blue toner, can take anywhere between five and 25 minutes, so it's important to make sure water is continually replenished.Give toning a try with three toners for under £13
Top Toning Tips
• Blue toners can add density to a print, so it's normally a good idea to print a bit lighter than usual.
• Some sepia toners reduce the density of a print, so print darker than usual.
• To get a deeper blue colour than normally possible, put the toned and washed print in a 1:9 dilution of paper developer for two minutes, then wash and tone again - and repeat the process if necessary. Using the same dilution of fixer has the reverse effect, creating a much paler shade of blue.
• A water temperature of about 20°C is ideal for washing prints.
• Toners can leave a scummy residue on top of the emulsion (especially blue) that becomes visible when the print is dry. Gently wiping the print with a lint-free cloth while it's wet removes the residue.All photographs copyright Martin Hooper and Jane Chilvers from Melvin Cambetties Davies book Toning and Tinting Made Easy, with kind courtesy of Fotospeed.
-
Posted by Rodney Bates
14th May 2020